
Home Studio Setup, Part II: Reaper DAW Customization
Like all users of Reaper, I love playing with customizing. Reaper is a wonderful “open canvas” opportunity to build the DAW the way you need it. Here is some information about my set up in Reaper.
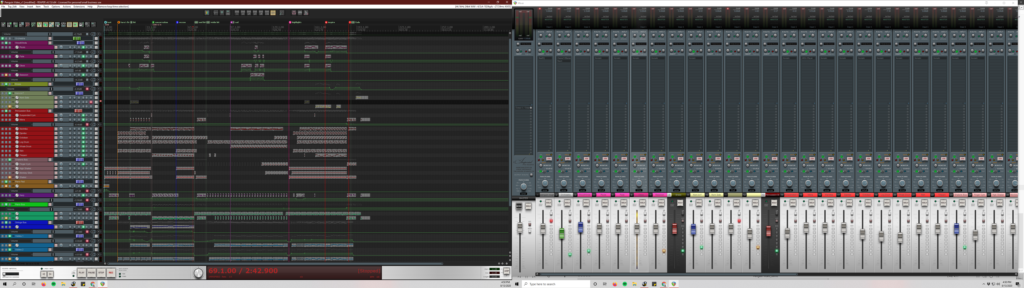
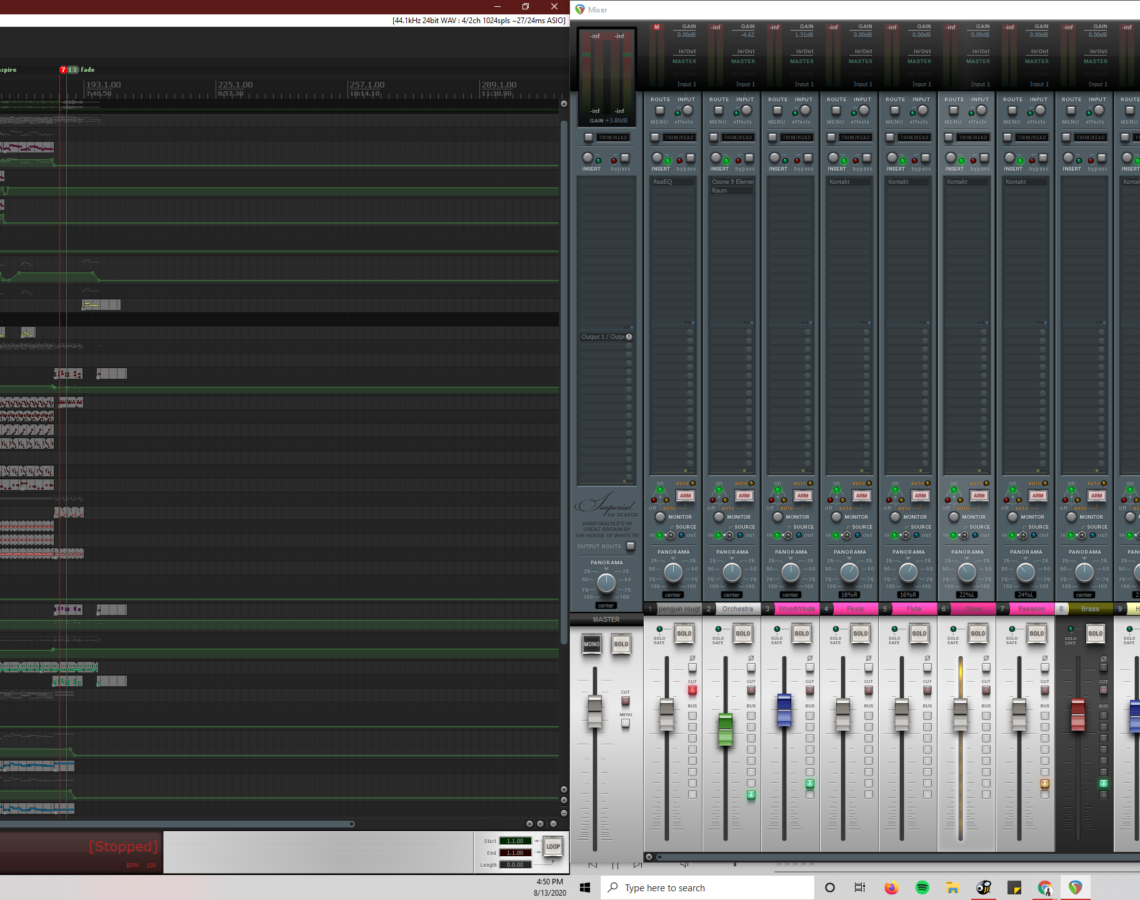
I’ve played with a few different themes, but the one I love the most is White Tie: Imperial. It’s beautiful, high resolution, and has an analog flair to it. Additionally, the different options for faders is really important to me. In a large orchestra orchestra piece I can easily see where the buses are in the track listing because of the faders. I will say, however, that setting all of this up and getting used to the theme took a little bit of time. This is the case with all new tools, so if you’re feeling stuck, just keep trudging through. Reaper is a deep rabbit hole. There is a massive community that is very helpful and Reaper’s manuals are important. There’s way too much to talk about with Reaper, so I’m only going to focus on a few keys for me from Reaper. If you want to know more, just ask!
SWS Extensions

SWS Extensions is a very powerful plug-in (also well documented) that adds a variety of new options to Reaper.
Auto-coloring is a terrific way that my projects stay organized. These are basic if then statements (you don’t have to code, that’s just how they function), but really speed up my process. For example, when I add a track and include the word “violin” in the title, it automatically is set to a specific color. The same goes for other instruments. Also, when tracks are placed inside a bus track or folder, the folder track automatically updates to a different colored fader in the track listing and mixer. The colors carry over for the parent track as well. This is a wonderful time saver as I’m building out an ensemble.
There are also tools like cycle actions to perform more complicated actions automatically. Let’s say you import an instrument and want it automatically set up with certain EQ, compressor, panning, and envelopes. You could set that all up in advance if it’s the type of thing you do repeatedly.
There are, of course, many other terrific tools that I’m not getting into, but if you’re using Reaper, you have to get SWS.
Custom Toolbars

Reaper has the ability to create custom actions. For example, let’s say you want to add a VST with a click of a button instead of having to search for it and add it manually. That would be nice, right?
Well I use Kontakt for almost everything, so I saved an effects chain as a custom action. So if I click on that little hazard sign, I’ll get the following:
ReaControlMIDI & Kontakt
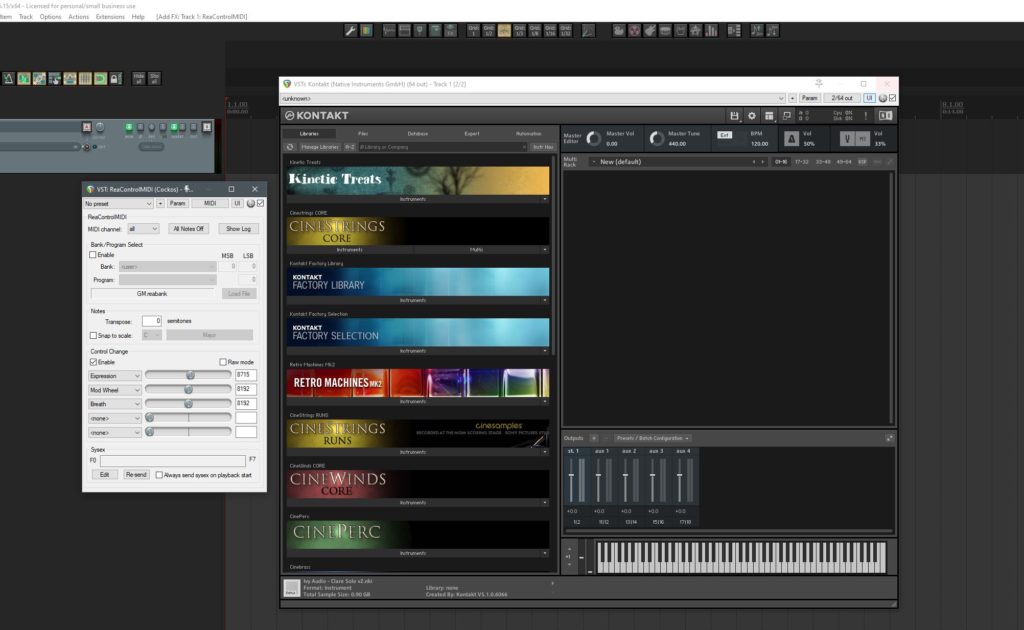
The ReaControlMIDI is giving my TouchOSC (something we’ll talk about in another post) control of parameters I enabled in the Control Change section. I did this because I want the expression and mod wheels to always be accessible to my TouchOSC template for performance with all of my Kontakt instruments.
Kontakt comes in empty, this way I can add whatever I want. I use this for a new instrument. When building out the orchestra, I have other track templates that I use.
Back to the toolbar. Each of those icons gives me a different plug-in that I use a lot and it’s set up in a way I want it. I have Spitfire VSTs, Guitar Rig, EQ, all sorts of things. You just set them up as a custom action and add them to the toolbar.
- Settings
- Project Settings
- Colors
- Other Options
- Peaks Display Settings
- Video Window
- Insert Marker
- Insert Region
- Show FX chain
- Window grid lines (whole note, half note, quarter note, triplet, eighth note, 16th note, 32nds note)
- Instruments
- Spitfire Audio
- Kontakt
- Guitar Rig
- SD5.5
- Synthesizer bus (this is a template set up for my ASM Hydrasynth)
- Raum (Native Instruments)
- ReaEQ
- Track Templates Folder
- Adjustments
- Reverse item
- Move item up an octave
- Move item down an octave
These shortcuts are also linked to my keyboard. As discussed in the post about my computer, I have a SteelSeries keyboard with a lot of extra buttons. these buttons are all tied to custom actions. I have a button on my keyboard right by the spacebar that opens and closes the mixer. It’s an amazing way to be able to move quickly through composing/mixing.
Track Templates
Track templates are wonderful. You can build out a set of instruments with a variety of parameters and then import them as you need them. One of the more useful templates I’ve built is each section of the orchestra
For example, here is my Woodwinds template. This includes all of the woodwinds in the section plus a bus. I save the colors, parameters in the FX, EQ setting, and icons for each instrument.
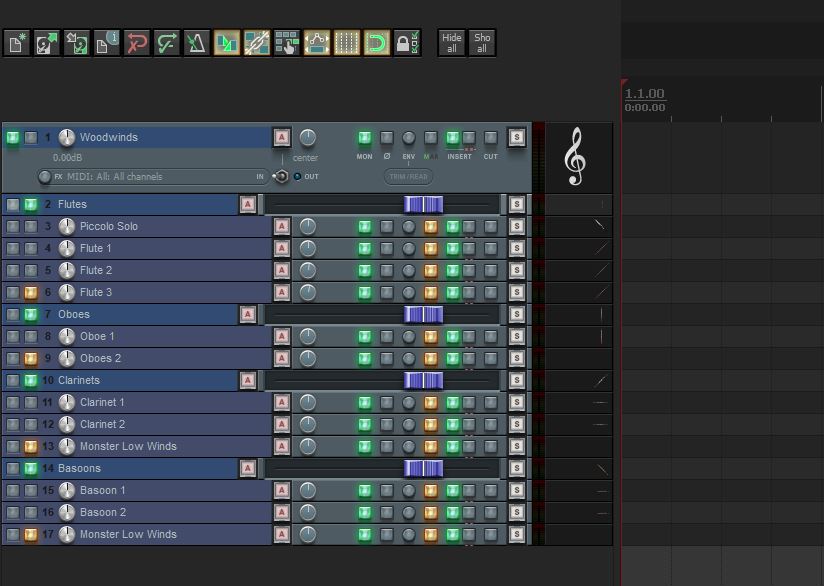
In this template and the other templates for the instrument sections, I did not set the panning. Some of the time I’m using these templates in different ways, so I like to start with the panning from scratch. I do, however, have a full orchestra template that has panning for the orchestra set.
I also have track templates for instruments:
- Brass
- Percussion
- Keyboards
- Harps
- Strings
- Drumset
- Guitars
- Synthesizers
Additionally, I have templates for the type of project, like if it was a rock band, jazz band, orchestra, etc.
MIDI Note Names
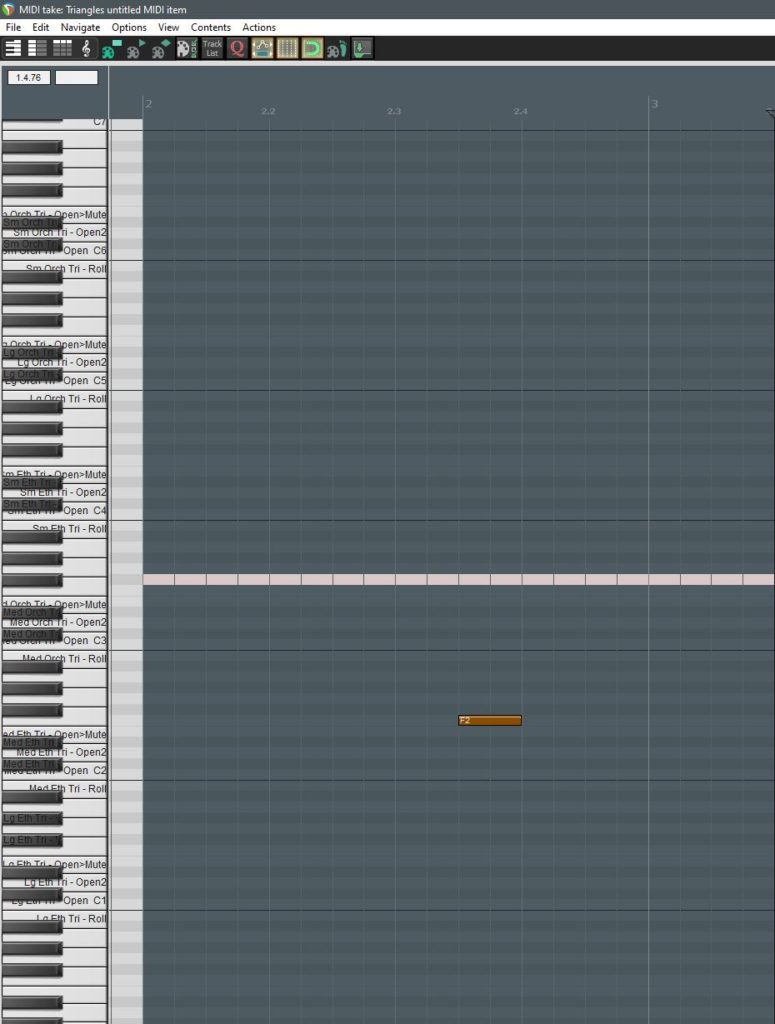
When working with MIDI instruments in piano roll, it’s easy to get confused at where the instruments are in percussion. So many different libraries organize the sounds differently. Tapspace Drumline is organized differently than Cinesamples Percussion, as well as others.
I spent a stupid amount of time in Notepad writing out the names of each instrument on each note so I can see them clearly in the piano roll. This is so helpful in the heat of battle composing. I for one have lost time and been frustrated trying to find the right sound on the roll, so this was a wonderful trick to save time.
To do this you create a Notepad file and type out the names similar to this:
# MIDI note name map

101
100
99
98
97
96
95
94
93
92
91
90
89
88 Sm Orch Tri - Open>Mute
87 Sm Orch Tri - Half Mute
86 Sm Orch Tri - Open2
85 Sm Orch Tri - Mute
84 Sm Orch Tri - Open
83 Sm Orch Tri - Roll
82
81
80
79
78
77
76 Lg Orch Tri - Open>Mute
75 Lg Orch Tri - Half Mute
74 Lg Orch Tri - Open2
73 Lg Orch Tri - Mute
72 Lg Orch Tri - Open
71 Lg Orch Tri - Roll
70
69
68
67
66
65
64 Sm Eth Tri - Open>Mute
63 Sm Eth Tri - Half Mute
62 Sm Eth Tri - Open2
61 Sm Eth Tri - Mute
60 Sm Eth Tri - Open
59 Sm Eth Tri - Roll
58
57
56
55
54
53
52 Med Orch Tri - Open>Mute
51 Med Orch Tri - Half Mute
50 Med Orch Tri - Open2
49 Med Orch Tri - Mute
48 Med Orch Tri - Open
47 Med Orch Tri - Roll
46
...
I save my files in a templates folder and title it with Library_Instrument. For the example above I used CinePerc_Triangle.txt. In the reaper MIDI window, select File>Note/cc names>Load… and select the file you saved. Boom, now you have the names of all your instruments!
I spend a lot of time working in Reaper changing my shortcuts, toolbars, and track templates. Like I said in this post, when you’re having off days, spend time perfecting your DAW. It’s time well spent.